
This tut is to show you a couple of ways of creating and tweaking curved or shaped text in photoshop. I will show you two methods, you may enjoy or prefer one or the other so make sure you read over both and decide how you would like to approach it :)
PLEASE NOTE: clicking on the images will open them in the window and make them actual size if you need to view them closer :)
Text Warp Methods:
First of all type in the text that you want to use.
 Ensure you are still in the text mode and click on the WARP TEXT tool in the upper menu bar. You will see a box pop up with a drop down menu. This menu is filled with selections of various preset warping functions such as a fish shape, flag warp and so on. You also have some tweaking bars that allow you to play around with the horizontal and vertical warping as well as a bend function on most presets. All of this allows you to warp your text.

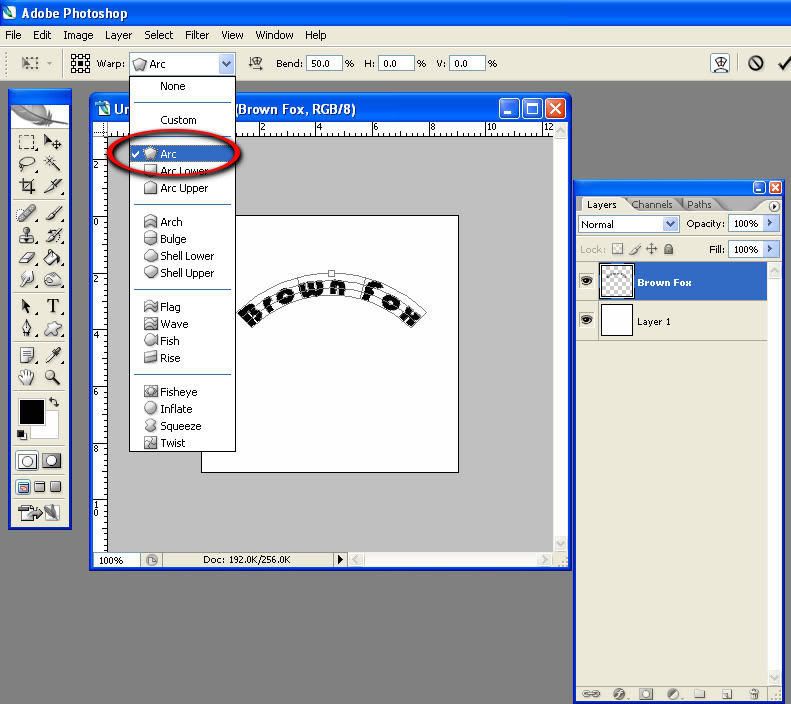
Now, select the ARC preset - you will notice that your text automatically changes to the default arc - play around with the bend function to see what happens - tweak it to get it as close as possible to what you need. Try not to worry too much about size as you can adjust the size using the scale function later - you can also tweak further by using the warp tool later. So just get it as close as possible for now :)
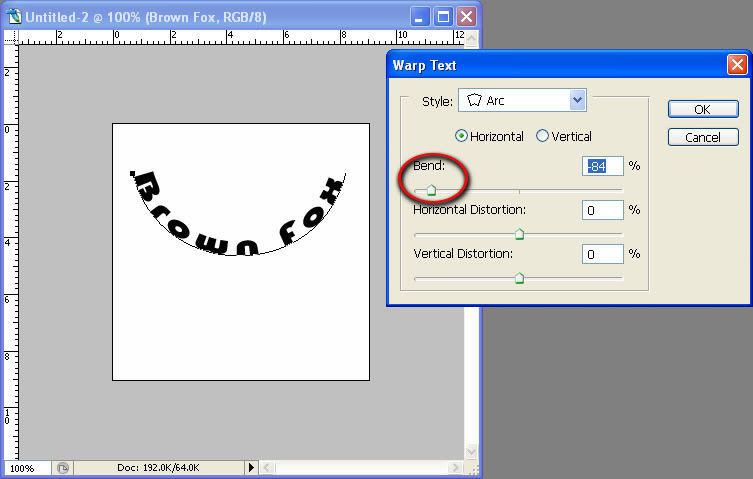
You will see that by playing with the bend slider that you can bend the text either up or down...

 When you are reasonably happy clock OK.
TWEAKING
If your text turns out a bit wonky, don't panic! The text warp function isn't perfect. You can tweak the text by using the edit/transform/warp function.
Its important to not that if you are still in the text tool and your text has not been rasterized, you will get a limited selection of what you can do - you will get one waypoint to warp like this...

if you see that, dont touch anything on the image just press return and then deselect the text tool and select the pointer tool. You need to right click on the text layer in your layer window and select/apply "rasterize layer". This turns the text into a normal layer.

now re do the edit/transform/warp function - you should see a whole different picture!! Notice the multiple waypoints? These allow you to pull, push and move that section of the text - it allows you to do anything from change structures of pictures to make slight tweaks - in this case the warp-ability will allow you to make sure your text looks super smooth, in line, and just how you want it!! Play around with those and see what you can come up with :)
PLEASE NOTE: clicking on the images will open them in the window and make them actual size if you need to view them closer :)
Text Warp Methods:
First of all type in the text that you want to use.
 Ensure you are still in the text mode and click on the WARP TEXT tool in the upper menu bar. You will see a box pop up with a drop down menu. This menu is filled with selections of various preset warping functions such as a fish shape, flag warp and so on. You also have some tweaking bars that allow you to play around with the horizontal and vertical warping as well as a bend function on most presets. All of this allows you to warp your text.
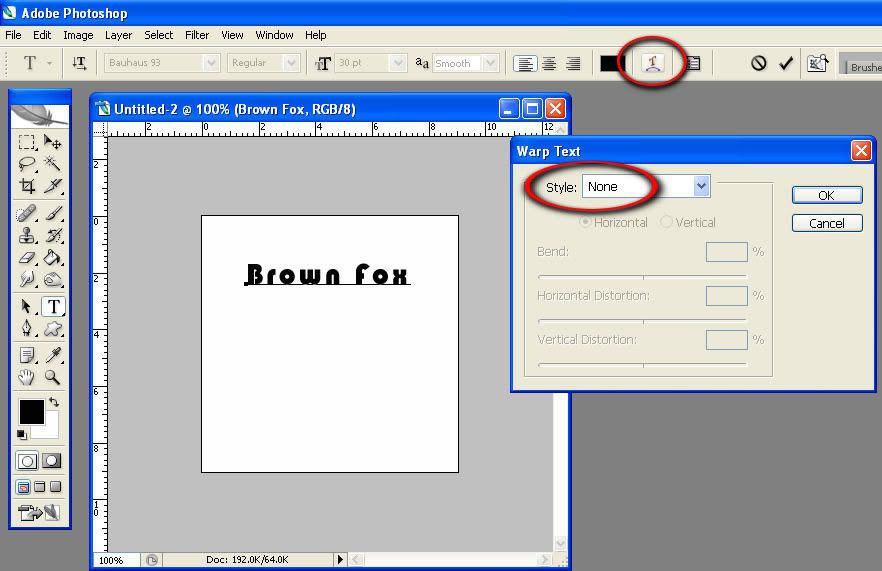 Now, select the ARC preset - you will notice that your text automatically changes to the default arc - play around with the bend function to see what happens - tweak it to get it as close as possible to what you need. Try not to worry too much about size as you can adjust the size using the scale function later - you can also tweak further by using the warp tool later. So just get it as close as possible for now :)
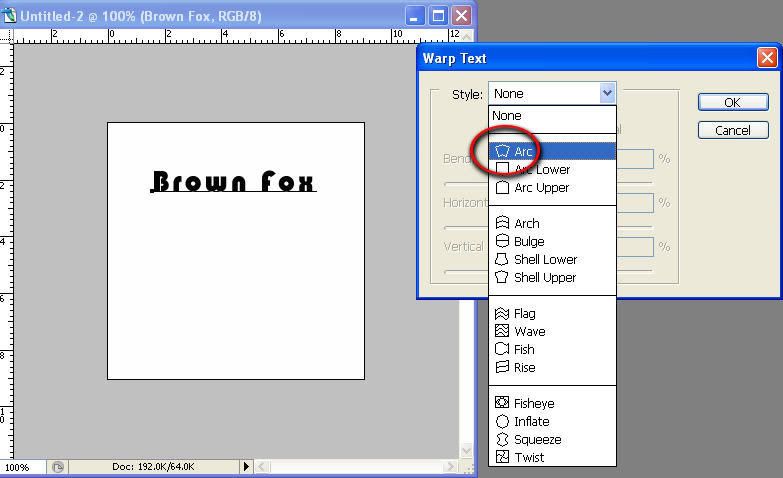 You will see that by playing with the bend slider that you can bend the text either up or down...
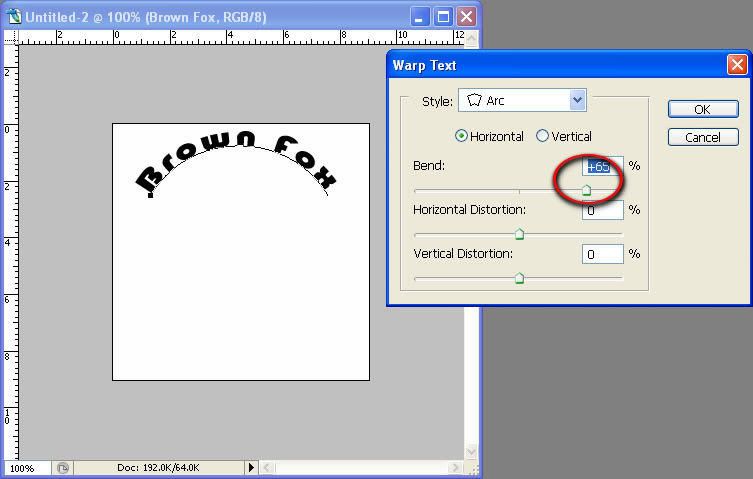
 When you are reasonably happy clock OK.
TWEAKING
If your text turns out a bit wonky, don't panic! The text warp function isn't perfect. You can tweak the text by using the edit/transform/warp function.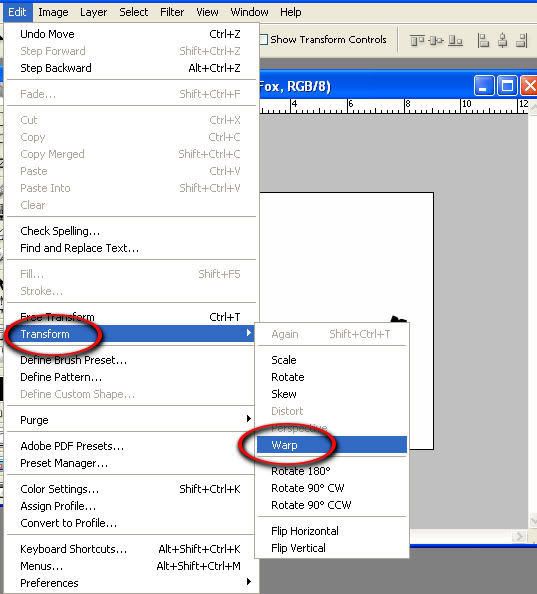 Its important to not that if you are still in the text tool and your text has not been rasterized, you will get a limited selection of what you can do - you will get one waypoint to warp like this...
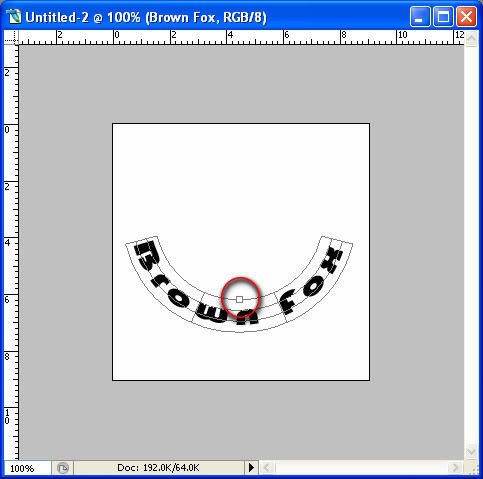 if you see that, dont touch anything on the image just press return and then deselect the text tool and select the pointer tool. You need to right click on the text layer in your layer window and select/apply "rasterize layer". This turns the text into a normal layer.
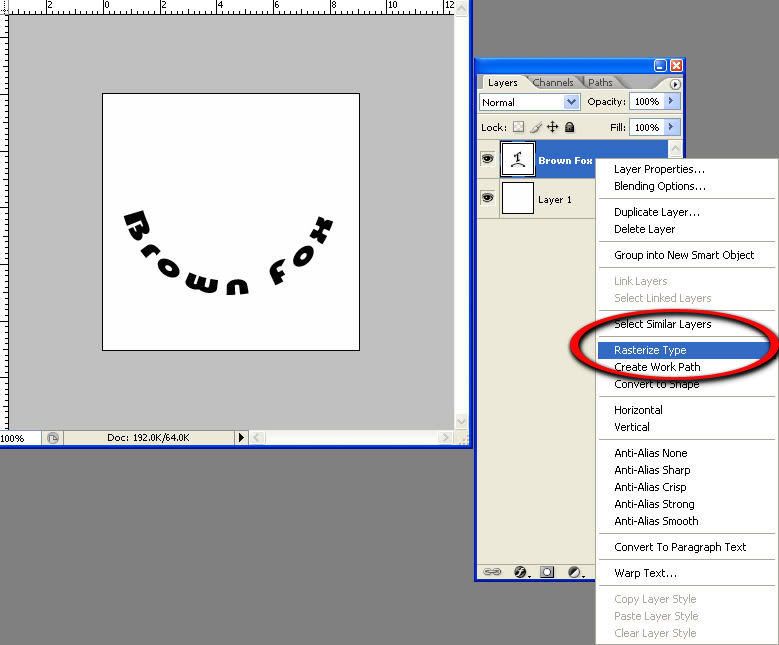 now re do the edit/transform/warp function - you should see a whole different picture!! Notice the multiple waypoints? These allow you to pull, push and move that section of the text - it allows you to do anything from change structures of pictures to make slight tweaks - in this case the warp-ability will allow you to make sure your text looks super smooth, in line, and just how you want it!! Play around with those and see what you can come up with :)
ANOTHER WAY!
Another way of doing this once you understand those basic concepts is to rasterize your text, then go to edit/transform/warp and you will see the customization tools in the top tool bar...This all does the same thing..so see which way you like to do all of it.
I prefer the text warp first only because I cant help but wonder if thats the best method seeming its made specifically for text? But you may find the regular warp tool more to your liking - its up to you from here!!!

No comments:
Post a Comment